Montageanleitung für Klebebuchstaben und eigene Motive
Bei unseren Klebefolien gibt es bei der Montage nicht viel unterschiede, dennoch musst Du ein bisschen was beachten. Deshalb sind im folgenden zwei Montageanleitungen zu finden. Einmal für Klebebuchstaben und einmal für das eigene Motiv. Wenn Du diese Montageanleitung befolgst gelingt Dir das aufkleben der Klebefolien kinderleicht. Du wirst feststellen das unsere Folien auf fast jedem Untergrund halten.
Eigenes Motiv
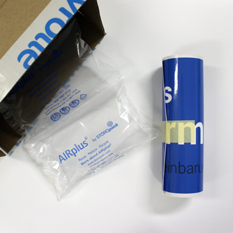
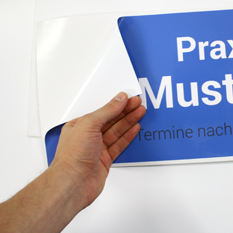
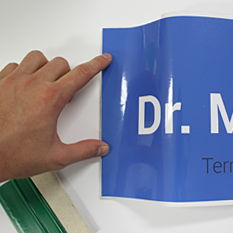
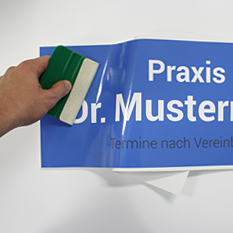
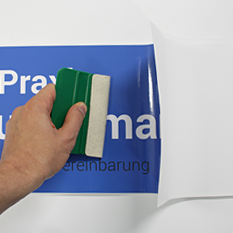
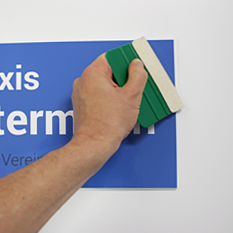
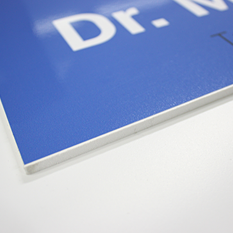
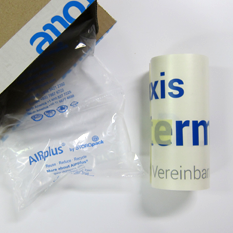
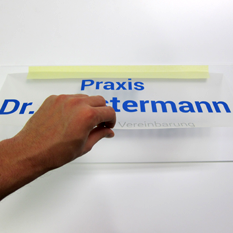
Deine Folie wird Dir in aufgerollt in einer Luftpolsterfolie geliefert. Zunächst musst Du sie ausrollen und flach auf eine Ebene legen Um evtl. Blasen und Knicke zu vermeiden, streiche die Folie auf dem Trägerpapier glatt. Löse jetzt ein Stück der Klebefolie vom Trägerpapier und klappe das Trägerpapier etwas nach hinten um. Fixiere die Klebefolie einseitig an den Ecken an der Position die Du vorher festgelegt hast. Drücke einen dünnen Streifen am Rand an, damit die Klebefolie haftet. Jetzt musst du von oben nach unten über die Klebefolie streichen und währenddessen das Trägerpapier Stück für Stück von der Klebefolie lösen. Verfahre mit gleichmäßigen Andruckbewegungen weiter, bis die komplette Folie auf dem Untergrund klebt. Kontrolliere besonders die Ränder und Ecken ob die Klebefolie hier hält. Deine Klebefolie sollte jetzt gleichmäßig ohne Blasen auf dem Untergrund kleben. Kleine Blasen kannst Du einfach mit einer Nadel aufstechen.
Klebebuchstaben
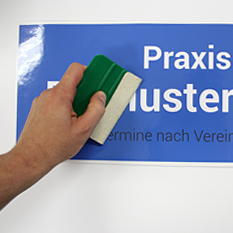
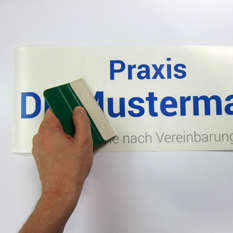
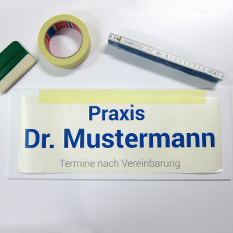
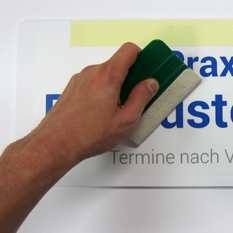
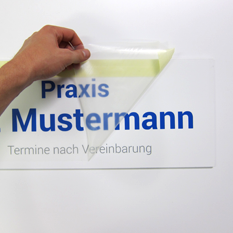
Du erhältst auch hier deine Folie aufgerollt und gepolstert mit Luftpolsterfolie in einem Paket. Rolle sie aus und lege sie flach auf eine ebene Fläche. Streiche fest über die Oberfläche um alle Buchstaben erneut an die Transferfolie anzudrücken. Wiederhole dies auch auf der Rückseite. Alle Buchstaben haften jetzt an der Transferfolie. Fixiere die Folie an der richtigen Position mit einem Streifen Klebeband am oberen Rand. Die Position kannst Du z.B mit einem Meterstab kontrollieren. Klappe die gesamte Folie nach oben um, so dass das Motiv auf dem Kopf steht. Du siehst jetzt die Rückseite der Folie (das Trägerpapier). Entferne in spitzem Winkel das Trägerpapier. Du legst jetzt die Klebeseite frei. (Sollten Buchstaben noch nicht an der durchsichtigen Transferfolie haften, streiche diese erneut fest.) Klappe die Folie wieder nach unten. Achte dabei darauf, dass die Klebefolie nicht ungewollt anklebt. Halte sie dabei straff und lege sie flach auf die Oberfläche. Streiche jetzt fest und gleichmäßig mit einem Rakel oder einer ähnlichen Anbringhilfe von oben nach unten über die Transferfolie. Du drückst somit die Buchstaben mit der klebenden Seite an den Untergrund. Ziehe jetzt vorsichtig (nicht zu schnell) die durchsichtige Transferfolie wieder ab. Achte dabei darauf, dass alle Buchstaben sich von der Transferfolie lösen und auf dem Untergrund haften.
All unsere Montageanleitungen kannst Du auch auf unserer Webseite finden.
 Tipps & Tricks